What to Know Before Starting a Personalized String Art Kit
Practical beginner tips for choosing a photo, preparing the kit, placing nails, handling thread, and creating smoother personalized string art.

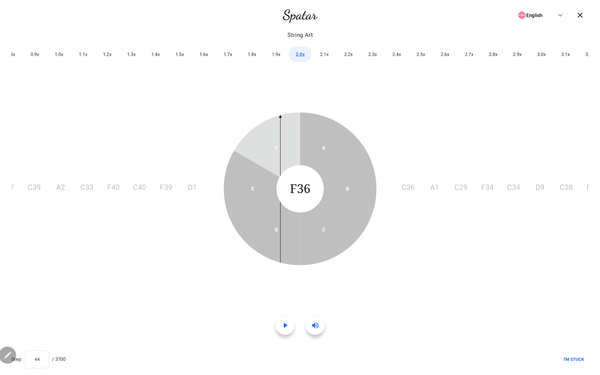
A personalized string art kit can look simple when you first open it. There is a circular board, nails, thread, and a pattern created from your photo. The idea is easy to understand: follow the steps, wrap the thread around the nails, and gradually watch the image appear.
But photo-based string art is more detailed than a simple craft project. It takes time, concentration, and a little preparation. A portrait made with thread is built from many individual lines, so the final result depends not only on the materials, but also on the photo you choose, the generated preview, the way the nails are placed, and how calmly the thread is handled.
This guide is meant to help beginners start with realistic expectations and avoid unnecessary frustration. With a little preparation, your first project can feel much smoother and more enjoyable.
Understand What Kind of DIY Project This Is
A personalized string art kit is a handmade project, not a quick printed decoration. The image is created line by line as the thread moves between numbered nails. At first, the pattern may look abstract. After many layers, shadows, facial features, and contrast begin to appear.
This process can be satisfying, but it is also repetitive. Some people find the rhythm relaxing. Others may find it demanding because it requires attention and patience. Both reactions are normal.
The best way to approach the project is to treat it as a slow creative process. You do not need to finish everything in one sitting. In fact, many people will have a better experience if they divide the work into several calm sessions.
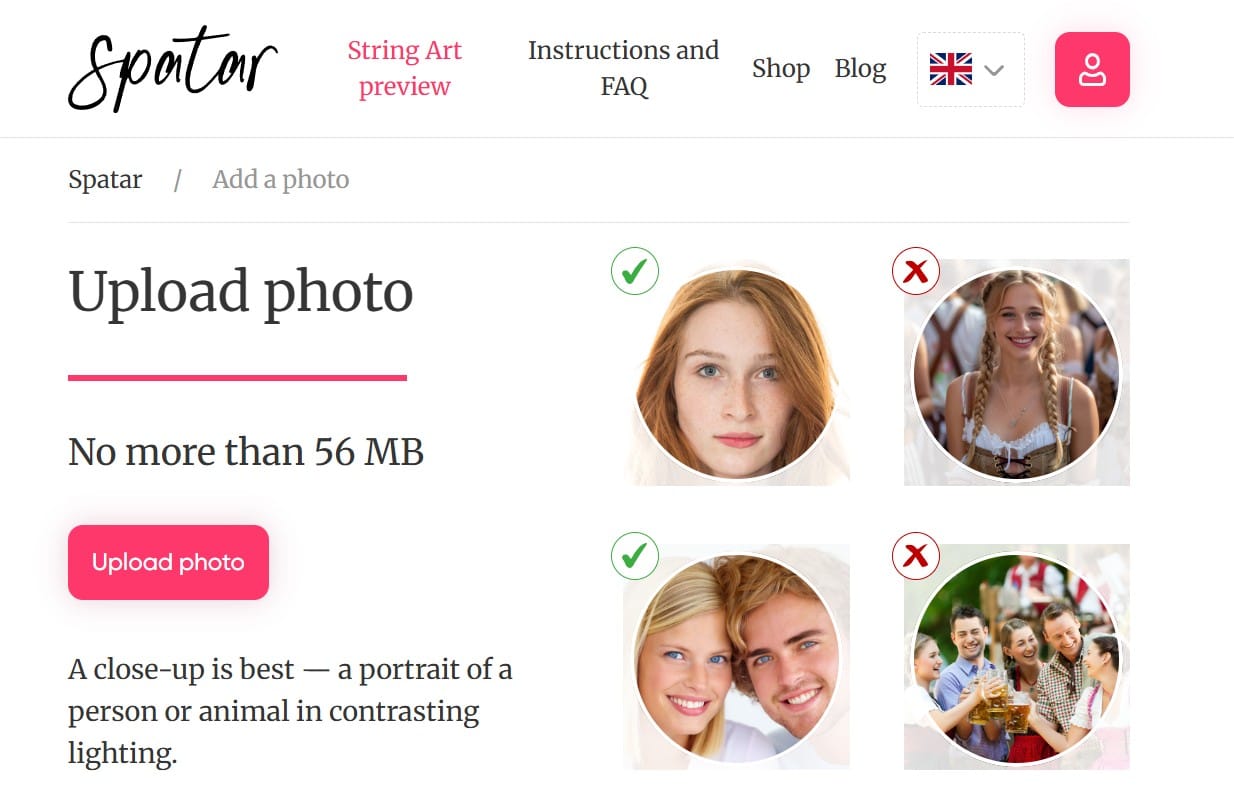
Choose the Photo Carefully
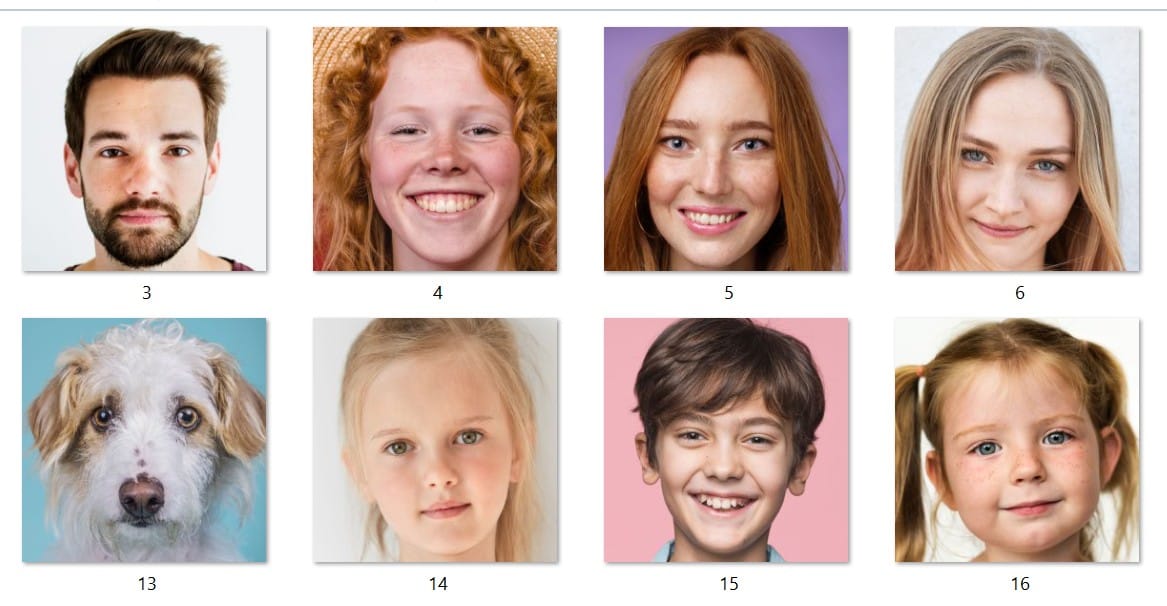
The photo is one of the most important parts of the whole project. A beautiful photo on your phone does not always become a strong string art image.
String art works through contrast, light, shadow, and simplified shapes. It cannot reproduce every tiny detail in the same way as a printed photograph. That is why some photos are much easier to turn into thread art than others.
A good photo usually has:
- A clear face or main subject
- Good contrast between light and dark areas
- Sharp focus
- A face or subject that is not too far away
- A simple background
- Not too many small details
- Good lighting around the eyes, nose, and mouth
Try to avoid photos that are very dark, blurry, heavily filtered, or taken from too far away. Group photos can also be difficult because each face becomes smaller and less detailed. Busy backgrounds, strong shadows, hair covering the face, or too many small objects may reduce the clarity of the final preview.
For portraits, a closer crop is often better than a full-body image. If the face fills more of the frame, the generated string art usually has more room to show the important details.
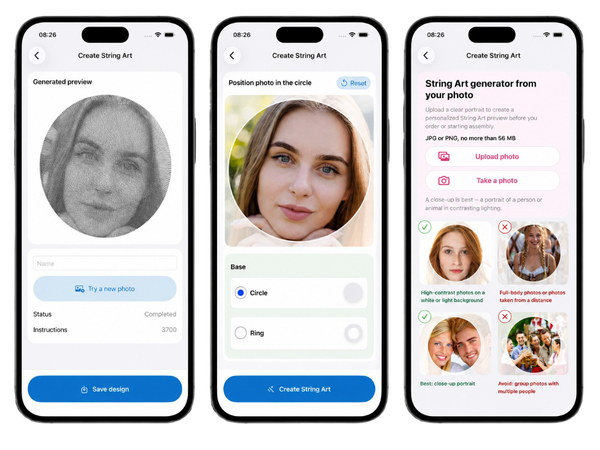
Use the Preview Before You Commit
The generated preview is not just a nice extra step. It is an important part of the process.
When you use the string art generator, you may need to test several photos before choosing the best one. This is completely normal. One image may look too dark, another may lose important facial features, and another may work much better simply because the contrast is stronger.
Before moving forward, look carefully at the preview and ask yourself:
- Is the person, pet, or subject clearly recognizable?
- Are the main features visible?
- Is there enough contrast?
- Does the image still feel close to the original memory?
- Are any important details missing?
Not every photo works equally well as thread art. The preview helps you make a better decision before you begin the physical work. Spending a few extra minutes at this stage can save a lot of time later.
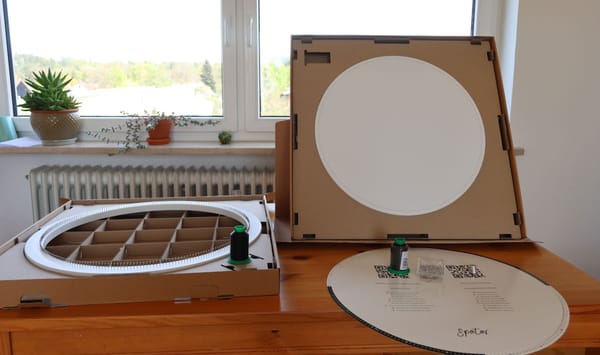
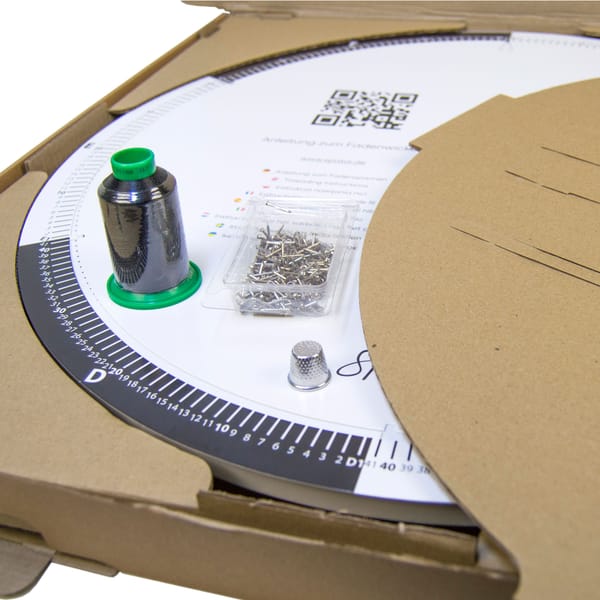
Prepare Your Workspace
Good preparation makes the project easier. Choose a stable table, good lighting, and a comfortable chair. Since the process can take time, your working position matters.
Keep all materials close to you: the circular board, nails, thread spool, instructions, and any tool you plan to use for inserting the nails. Make sure you have enough space around the board so the thread does not catch on other objects.
The circular box or packaging can also be useful while working. Instead of putting it aside, you can reuse it as a practical stand or support for the board. This may help keep the frame at a more comfortable angle and make the threading process easier to control.
Before starting, check that:
- The board is stable
- The lighting is bright enough
- The thread spool is easy to hold
- The instructions are easy to read
- Your chair and table height feel comfortable
- You have enough time and are not rushing
A few minutes of preparation can make the whole project feel calmer.
Place the Nails Slowly and Straight
The board already has pre-drilled holes, so you do not need to measure the nail positions yourself. The holes are prepared to guide the nail placement and help keep the nail height consistent across the circle.
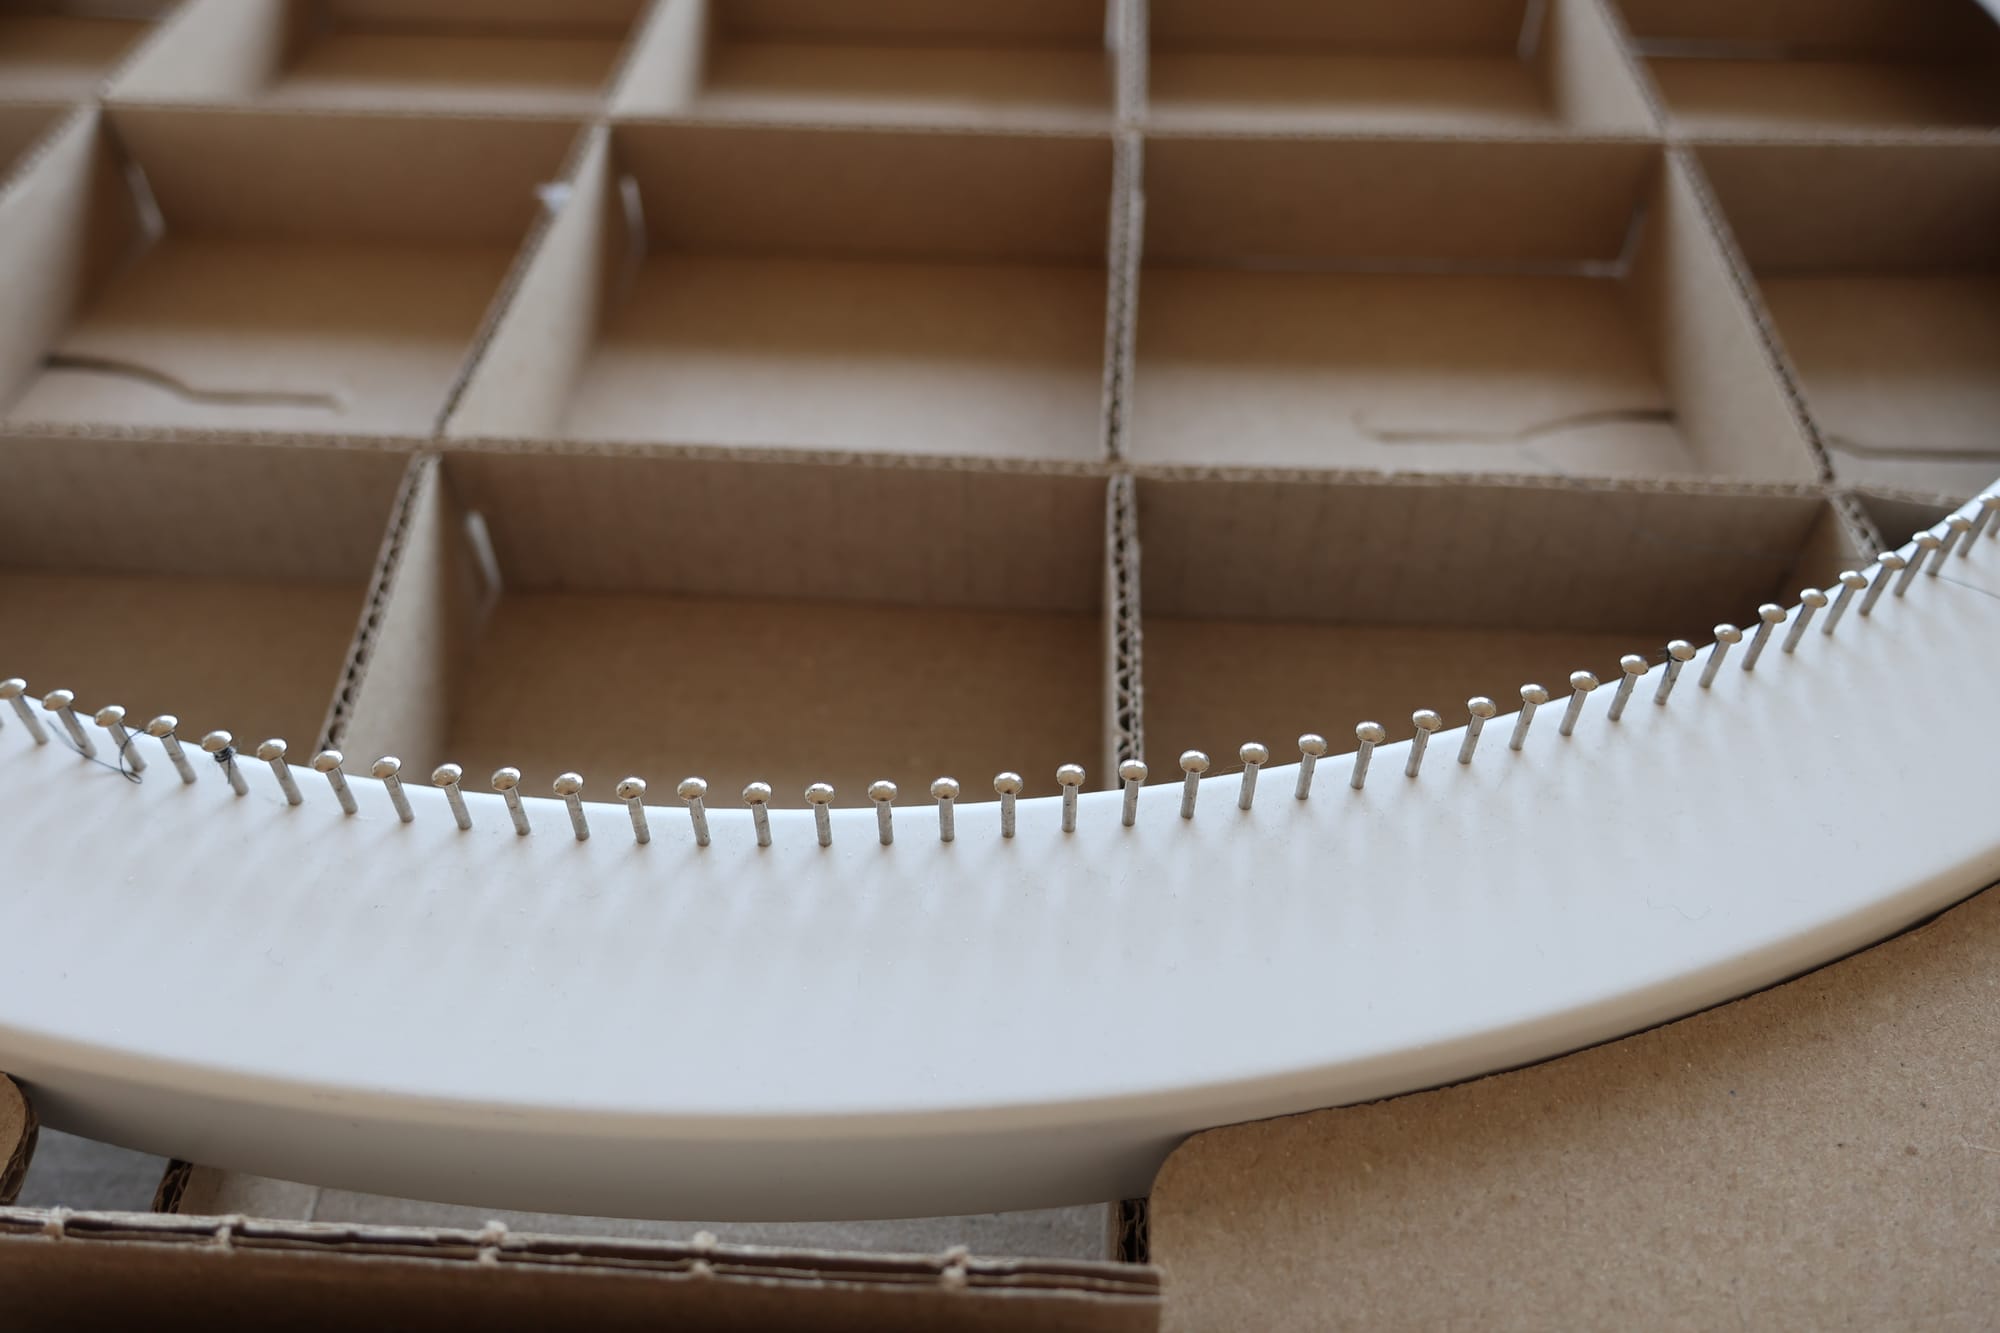
Important: When placing the numbered template on the wooden base, make sure that nail A1 is positioned at the top, directly in front of the wall-hanging hole on the back of the base. This helps the finished artwork hang in the correct orientation.
Still, it is important to insert each nail carefully. Place every nail into its prepared hole as straight as possible, so the thread can move cleanly around the circle later.
You do not need to force the nails too deeply. The holes already help define the correct position. The goal is simply to make sure each nail sits securely, straight, and stable enough for the thread to wrap around it comfortably.
Use the thimble included in the kit to press the nails into the prepared holes. It helps protect your finger and gives you better control while placing the nails. Placing all nails usually takes around 30 minutes, so it is best to work calmly and avoid rushing this step.
This part may feel repetitive, but it is worth doing slowly. A clean, straight nail setup makes the threading stage much easier.
Check the Instructions Format
You can follow the pattern digitally or from a printed PDF. Both methods have advantages.
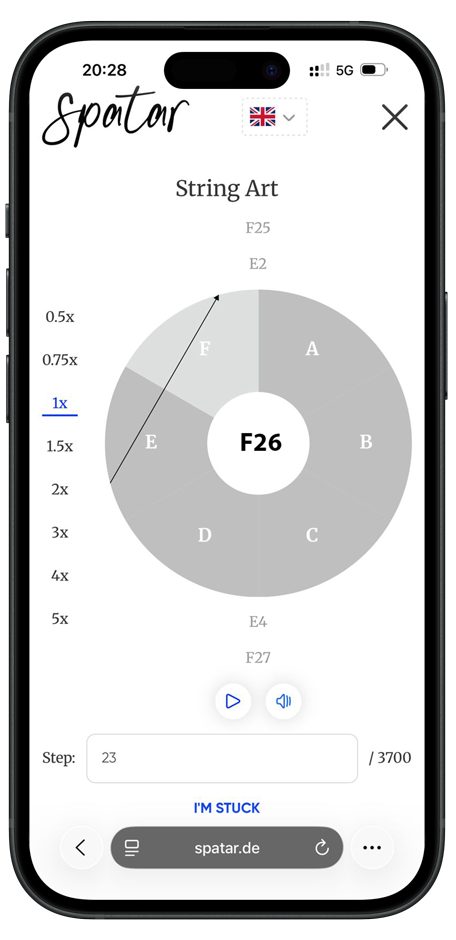
Using a phone or tablet is practical, follow the steps one by one, and keep the instructions close to the board. This is often the easiest option for long patterns.
A printed PDF can also be helpful if you prefer paper or want to mark your progress manually. If you print the instructions, check them before starting. Make sure the numbers and lines are clearly visible, and check that the page scaling is correct. Nothing should be cut off near the edge of the page.
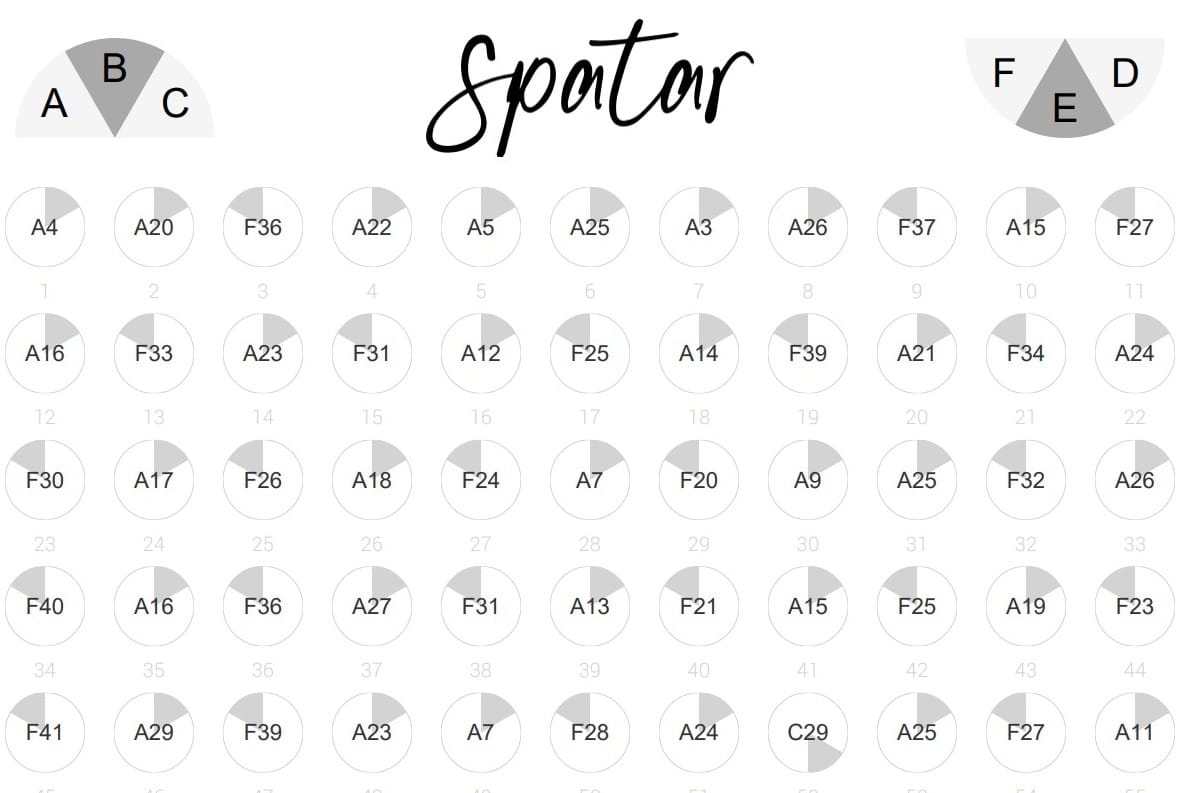
Before using printed instructions, check:
- Are all numbers readable?
- Are the lines clear?
- Is the page printed at the correct scale?
- Is anything cut off at the bottom or sides?
- Can you follow the sequence without confusion?
The most important thing is that your chosen format is comfortable and easy to read.
Tie the First Knot Carefully
Starting the thread can feel a little uncertain the first time. Begin by tying the thread securely to the first nail shown in the pattern.
Keep the knot small and tight. A large knot may become visible later or get in the way as more thread layers build up. If possible, place it where it will be less noticeable in the final design.
After tying the knot, pull gently to check that it holds. Do not pull hard. The knot should be secure, but the thread does not need to be stretched with force.
A good first knot should be:
- Small
- Secure
- Close to the nail
- Not bulky
- Placed discreetly
Once the first knot is done, the process usually starts to feel more natural after a few steps.
Keep the Thread Spool in Your Hand
Thread handling is one of the most important practical parts of the project. The thread is thin, and although it is strong, it can twist, catch, or form knots if too much is unwound at once.
A good habit is to keep the spool in your hand while working. This gives you more control over how much thread comes out. Pull only a short length at a time and let the spool release thread gradually as you move from nail to nail.
Avoid unwinding a long section in advance. Long loose thread can wrap around nails, catch on the board, or tangle on the table.
Helpful habits include:
- Hold the spool comfortably in your hand
- Release the thread gradually
- Pull only short lengths as needed
- Watch for twisting
- Stop if the thread catches
- Untangle gently instead of pulling harder
If the thread begins to knot, pause and fix it slowly. Pulling with force usually makes the knot tighter.
Keep the Thread Lightly Tensioned
Thread tension matters, but it does not mean you need to pull hard. Before you begin, prepare the thread spool so it sits comfortably in your hand and the thread can come out gradually while you work.
Keep the thread only lightly tensioned as you guide it from nail to nail. There is no need to stretch it strongly or pull with force. As the thread layers build up, they naturally support each other and help create the final image and overall tension.
The goal is steady, controlled movement, not tight pulling. If the thread is pulled too hard, the nails may bend, the thread may break, or your hands may become tired quickly. If the thread feels too loose, gently adjust it, but avoid forcing it.
A good working tension should feel:
- Light but controlled
- Easy to maintain
- Not forceful
- Comfortable for your hand
- Firm enough to stay around the nails
Think of the process as guiding the thread, not stretching it. The image becomes stronger as more layers are added.
Take Breaks When You Need Them
A personalized string art portrait can involve many steps. Depending on the design, this may mean hundreds or even thousands of thread connections.
This repetition is part of the artwork, but it can also be physically tiring. Your hands, neck, shoulders, or back may become tense if you work for too long without a pause.
It is perfectly fine to stop and continue later. Short breaks help you stay focused and reduce mistakes. Stretch your fingers, relax your shoulders, and look away from the pattern for a few minutes.
A slower pace often leads to a cleaner and more enjoyable result.
Before You Start: Quick Checklist
- The photo preview looks clear and recognizable
- You have tested another photo or crop if the first preview was weak
- The board is placed on a stable surface
- The circular box or packaging is ready to use as a stand if helpful
- Nails are inserted straight and evenly
- The first knot is small and secure
- The spool can be held comfortably in your hand
- The pattern is easy to read on your phone or printed PDF
- Printed instructions have been checked for scaling and line visibility
- You have enough time and do not need to rush
Common Beginner Mistakes
Choosing a photo that is too dark or distant
A clear, close, high-contrast photo usually works better than a busy or shadowy image.
Skipping the preview stage
The first uploaded photo is not always the best option. Testing several images can improve the final result.
Starting before checking printed instructions
If you use a printed PDF, check that all lines and numbers are visible before you begin.
Pulling the thread too hard
The thread should be lightly tensioned, not stretched with force.
Working too long without breaks
Tired hands and a stiff neck make mistakes more likely. Short pauses help.
Expecting the image to appear immediately
The portrait builds gradually. Early stages may look unclear, but the image becomes stronger as more thread layers are added.
A Slower Project, but a More Meaningful Result
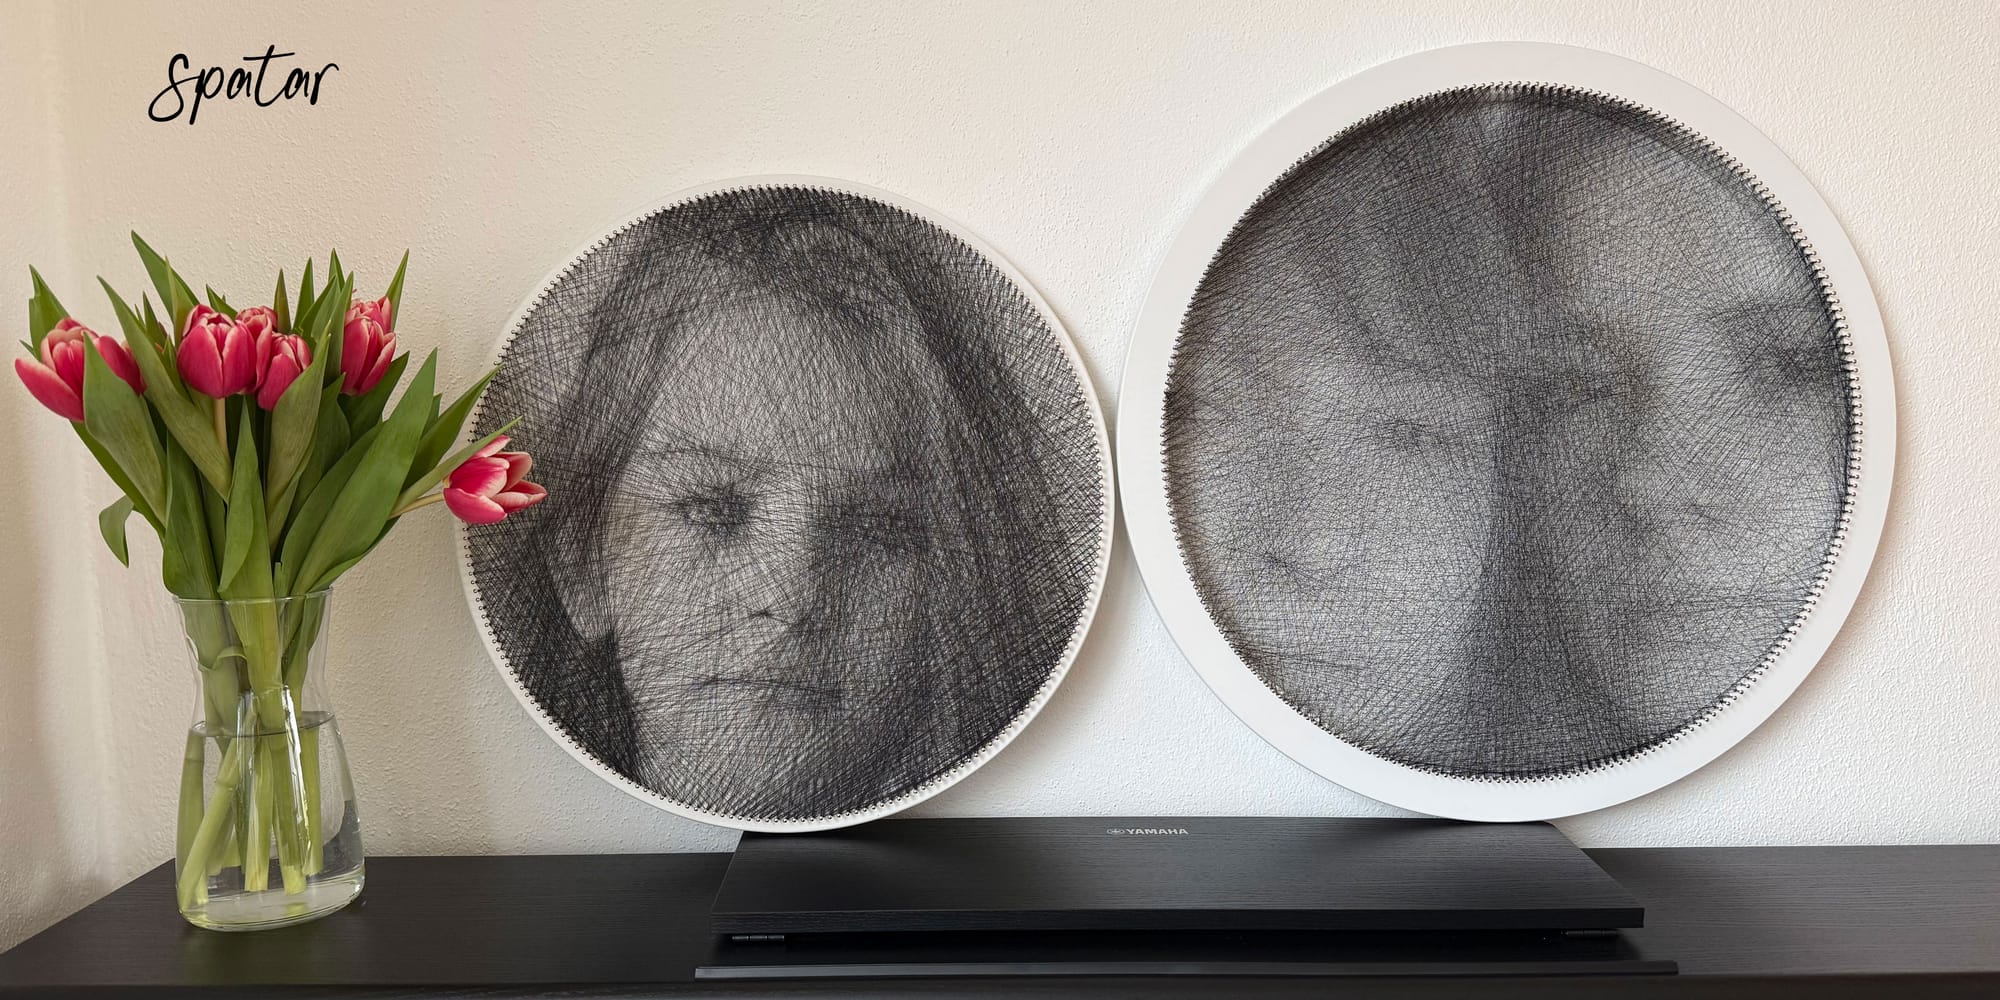
A personalized string art kit is not only about the finished picture. It is also about the process: choosing the photo, testing the preview, placing the nails, tying the first knot, guiding the thread, and slowly watching the image appear.
That is why personalized string art by Spatar can feel different from a standard poster or printed canvas. The finished piece carries the memory of the photo, but also the time and patience spent creating it by hand.
For a smoother first project, preview carefully, prepare your workspace, work slowly, keep the spool in your hand, use only light thread tension, and take breaks when needed. The final artwork becomes meaningful not because it was instant, but because a personal photo, steady hands, and real handmade effort came together in one piece.
Share this article Share to
Written by
Join the conversation
String Art Ring as a Gift for Parents, Couples or Friends
Spatar String Art Is Now Available on the Apple App Store
DIY String Art Kit: What Is Inside and How It Works